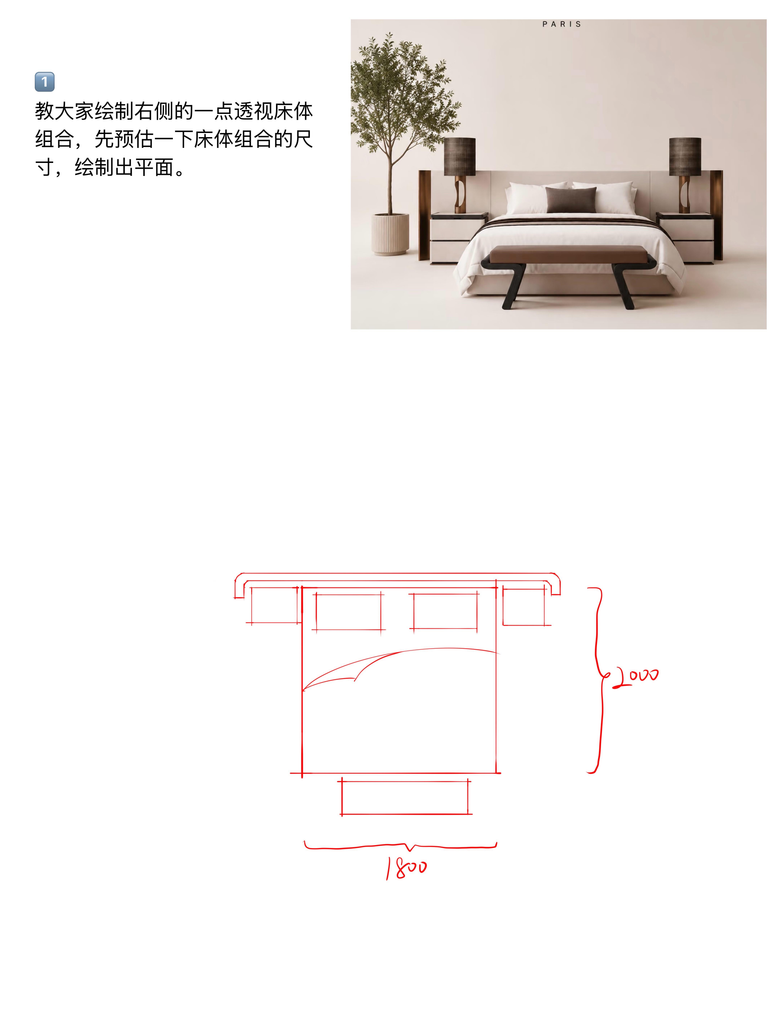
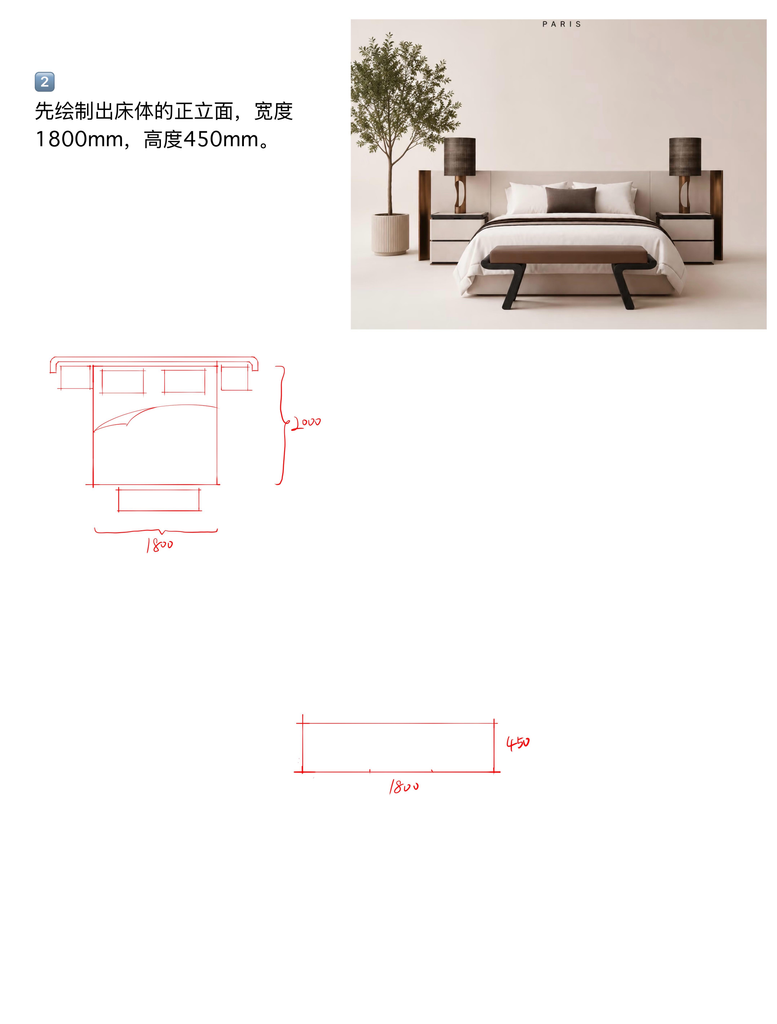
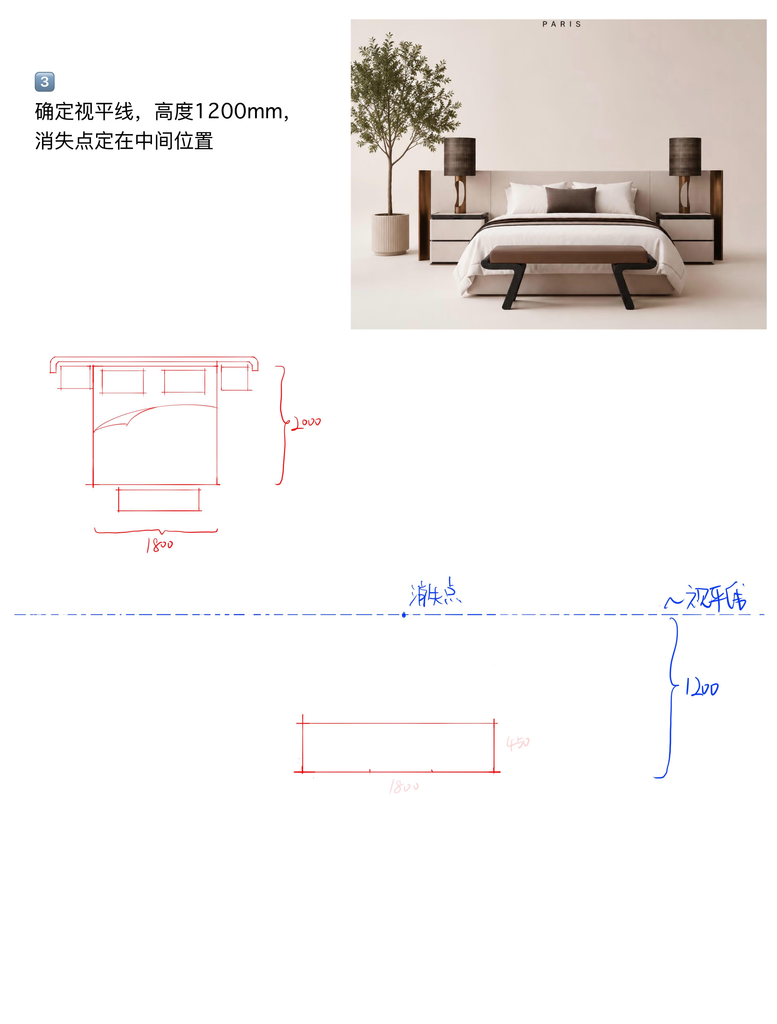
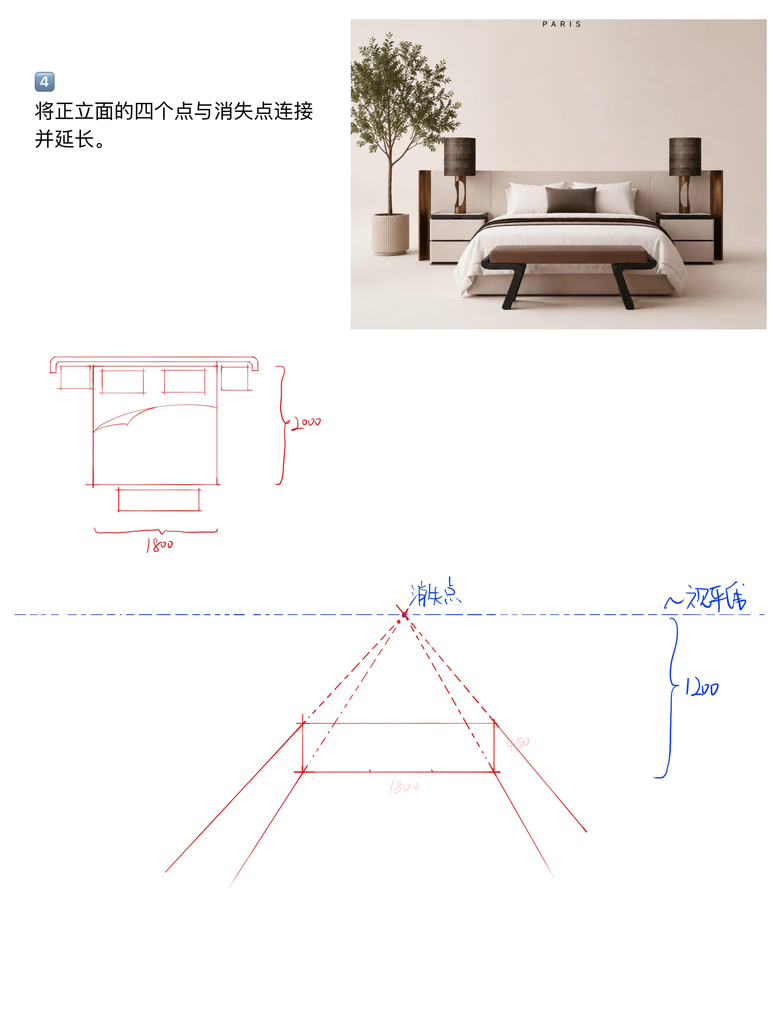
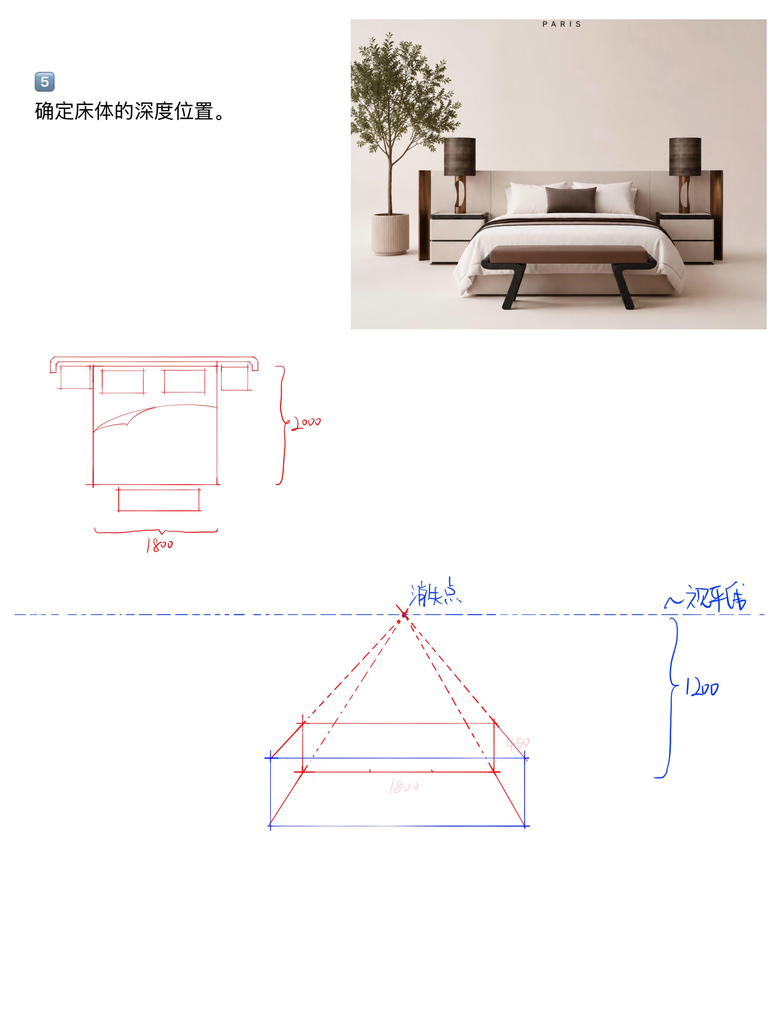
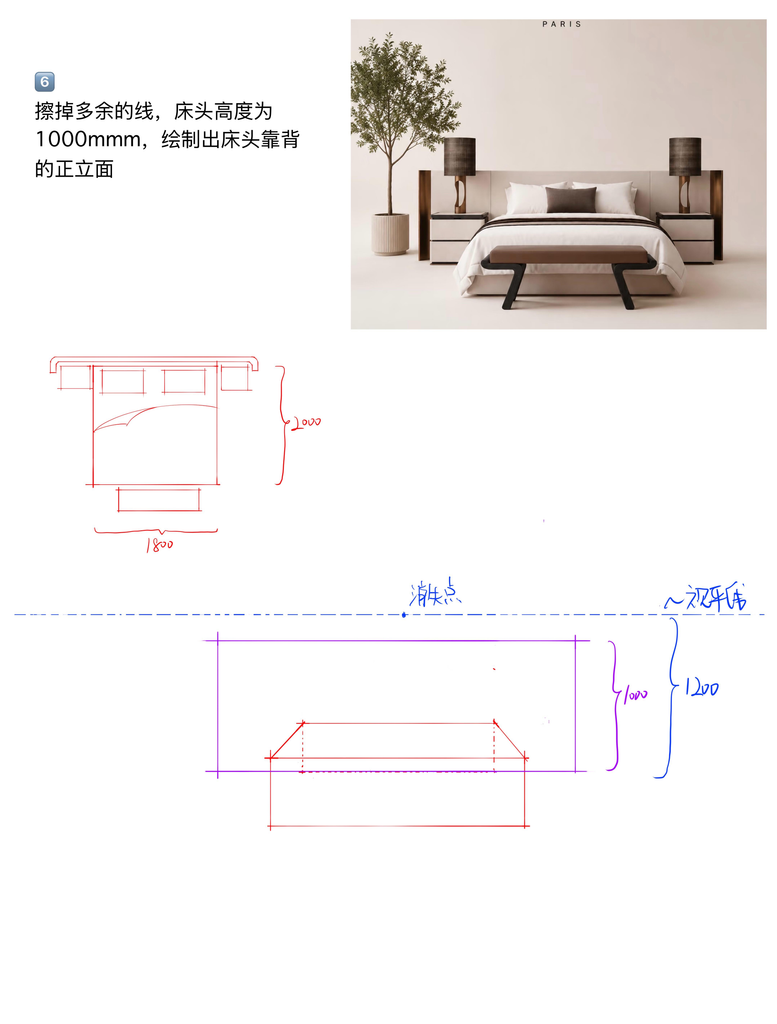
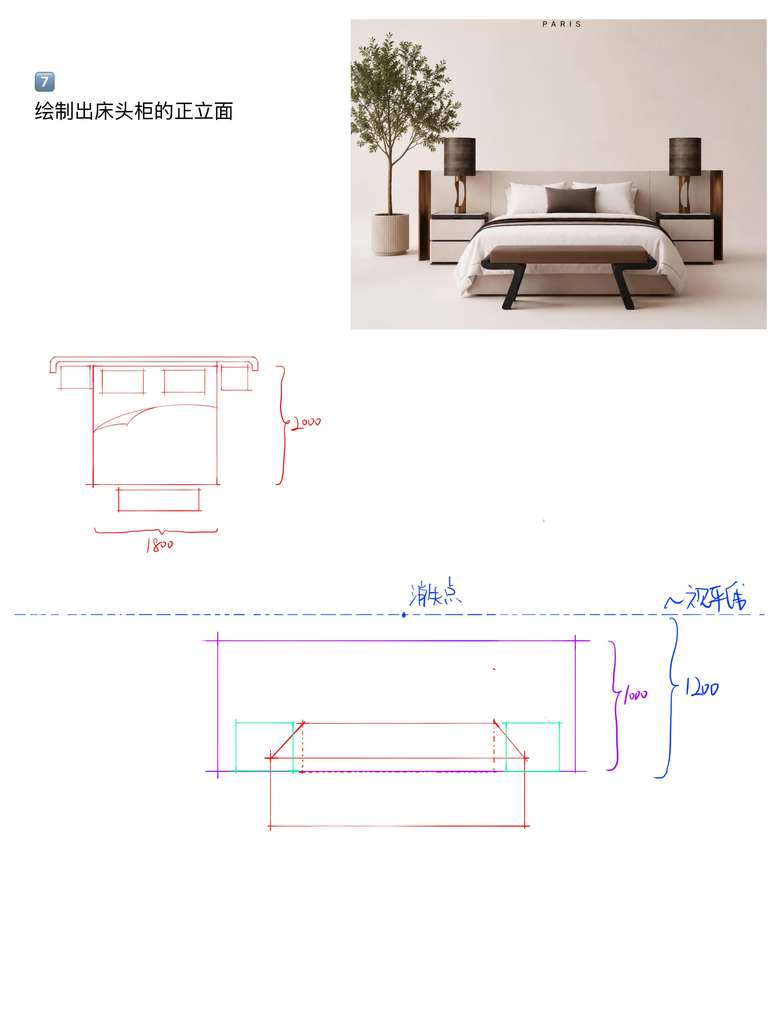
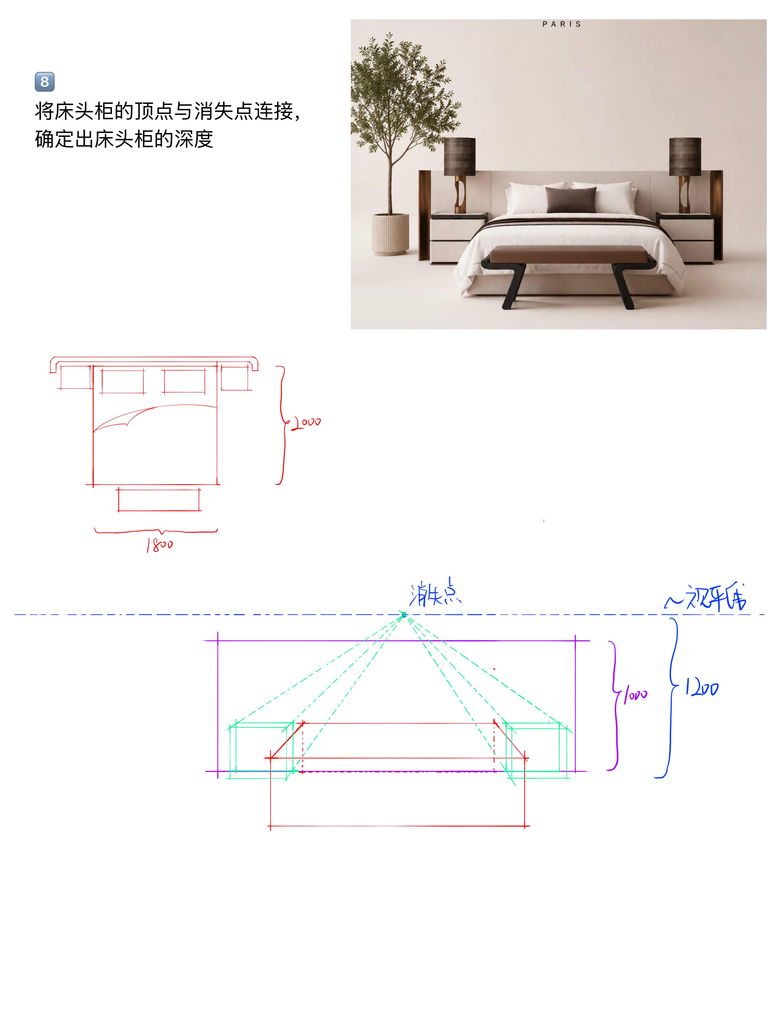
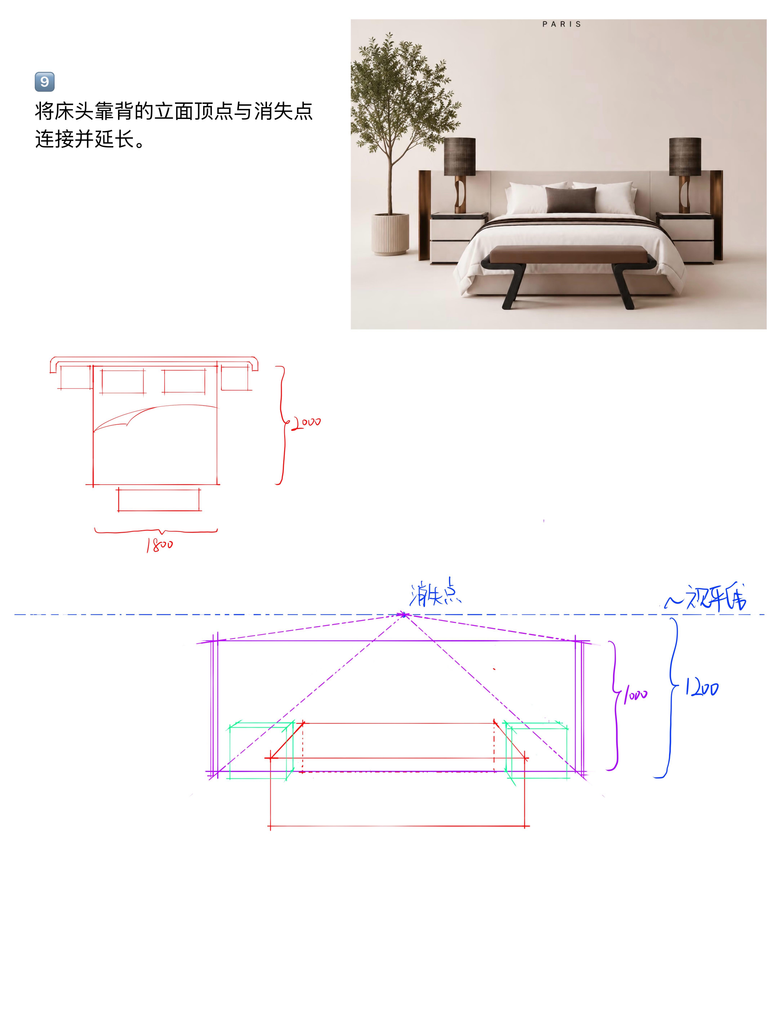
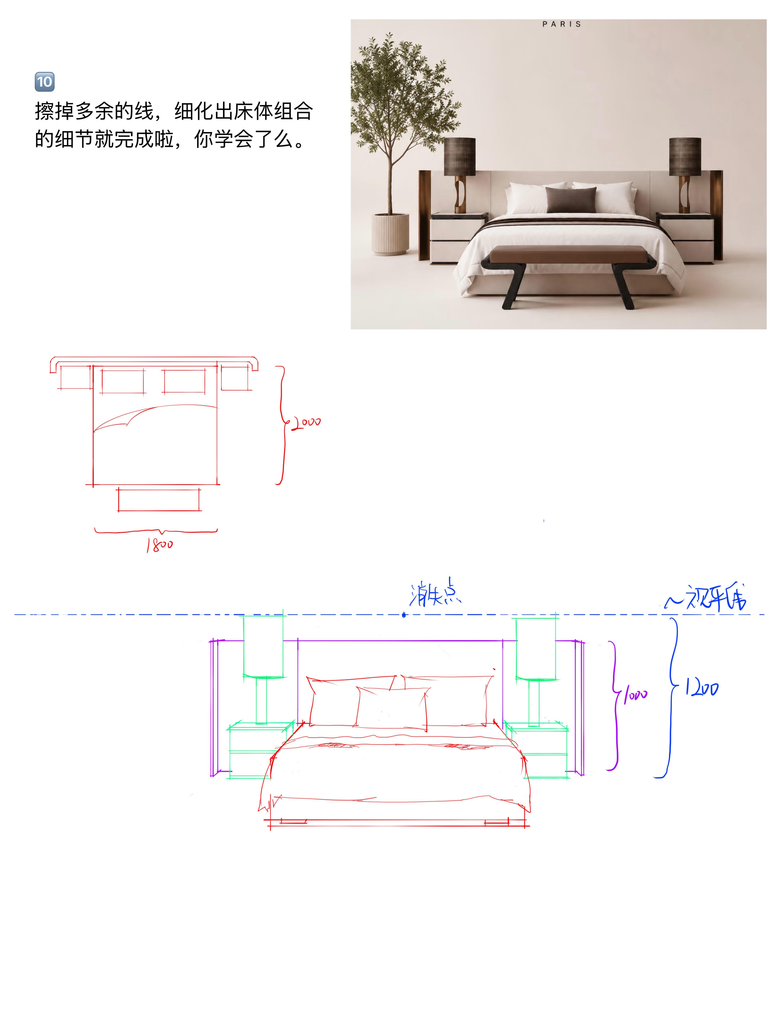
{\”capa_image_quality_ios_image_direct_post_file_size\”:\”10240\”,\”DeviceModel\”:\”iPhone14,5\”,\”capa_image_quality_process_sink_v2\”:\”1\”}{\”capa_image_quality_ios_image_direct_post_file_size\”:\”10240\”,\”DeviceModel\”:\”iPhone14,5\”,\”capa_image_quality_process_sink_v2\”:\”1\”}{\”capa_image_quality_ios_image_direct_post_file_size\”:\”10240\”,\”DeviceModel\”:\”iPhone14,5\”,\”capa_image_quality_process_sink_v2\”:\”1\”}{\”capa_image_quality_ios_image_direct_post_file_size\”:\”10240\”,\”DeviceModel\”:\”iPhone14,5\”,\”capa_image_quality_process_sink_v2\”:\”1\”}{\”capa_image_quality_ios_image_direct_post_file_size\”:\”10240\”,\”DeviceModel\”:\”iPhone14,5\”,\”capa_image_quality_process_sink_v2\”:\”1\”}{\”capa_image_quality_ios_image_direct_post_file_size\”:\”10240\”,\”DeviceModel\”:\”iPhone14,5\”,\”capa_image_quality_process_sink_v2\”:\”1\”}{\”capa_image_quality_ios_image_direct_post_file_size\”:\”10240\”,\”DeviceModel\”:\”iPhone14,5\”,\”capa_image_quality_process_sink_v2\”:\”1\”}{\”capa_image_quality_ios_image_direct_post_file_size\”:\”10240\”,\”DeviceModel\”:\”iPhone14,5\”,\”capa_image_quality_process_sink_v2\”:\”1\”}第一步:平面尺寸預估 教大家繪製右側的一點透視床體組合,先預估一下床體組合的尺寸,繪製出平面。 Step 1: Planar Dimension Estimation Teach everyone to draw the one-point perspective bed combination on the right. First, estimate the dimensions of the bed combination and draw the floor plan. 第二步:繪製床體正立面 先繪製出床體的正立面,寬度 $1800\text{mm}$,高度 $450\text{mm}$。 Step 2: Draw the Front Elevation of the Bed First, draw the front elevation of the bed body with a width of $1800\text{mm}$ and a height of $450\text{mm}$. 第三步:確定視平線與消失點 確定視平線,高度 $1200\text{mm}$,消失點定在中間位置。 Step 3: Determine the Horizon Line and Vanishing Point Determine the horizon line at a height of $1200\text{mm}$ and place the vanishing point in the middle position. 第四步:連接消失點與延長 將正立面的四個點與消失點連接並延長。 Step 4: Connect the Vanishing Point and Extend Connect the four points of the front elevation to the vanishing point and extend them. 第五步:確定床體深度 確定床體的深度位置。 Step 5: Determine the Depth of the Bed Body Determine the depth position of the bed body. 第六步:繪製床頭靠背正立面 擦掉多餘的線,床頭高度為 $1000\text{mm}$,繪製出床頭靠背的正立面。 Step 6: Draw the Front Elevation of the Headboard Backrest Erase excess lines, set the headboard height to $1000\text{mm}$, and draw the front elevation of the headboard backrest. 第七步:繪製床頭櫃正立面 繪製出床頭櫃的正立面。 Step 7: Draw the Front Elevation of the Nightstands Draw the front elevation of the nightstands. 第八步:確定床頭櫃深度 將床頭櫃的頂點與消失點連接,確定出床頭櫃的深度。 Step 8: Determine the Depth of the Nightstands Connect the vertices of the nightstands to the vanishing point to determine their depth. 第九步:連接床頭靠背立面頂點 將床頭靠背的立面頂點與消失點連接並延長。 Step 9: Connect the Vertices of the Headboard Backrest Elevation Connect the elevation vertices of the headboard backrest to the vanishing point and extend them. 第十步:細節細化與完成 擦掉多餘的線,細化出床體組合的細節就完成啦,你學會了么。 Step 10: Detail Refinement and Completion Erase excess lines and refine the details of the bed combination. It’s all done, did you learn it?