
Beginner’s Hand-Drawn Guide: One-Point Perspective Breakdown of a Bedroom Space (Part 1)
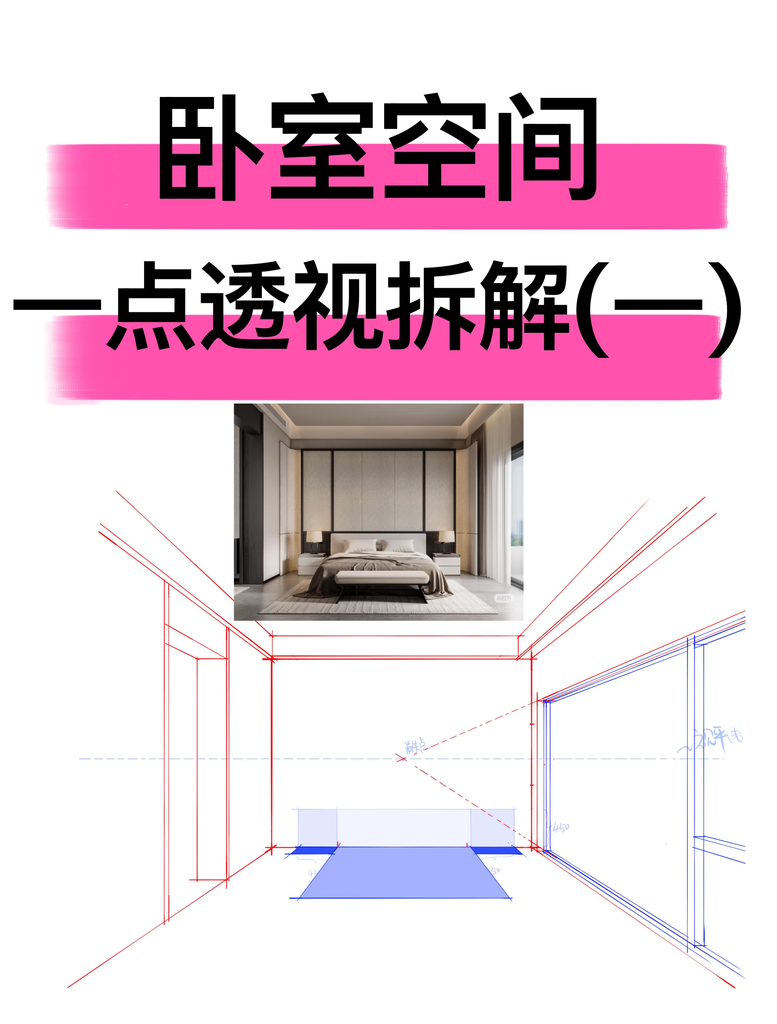
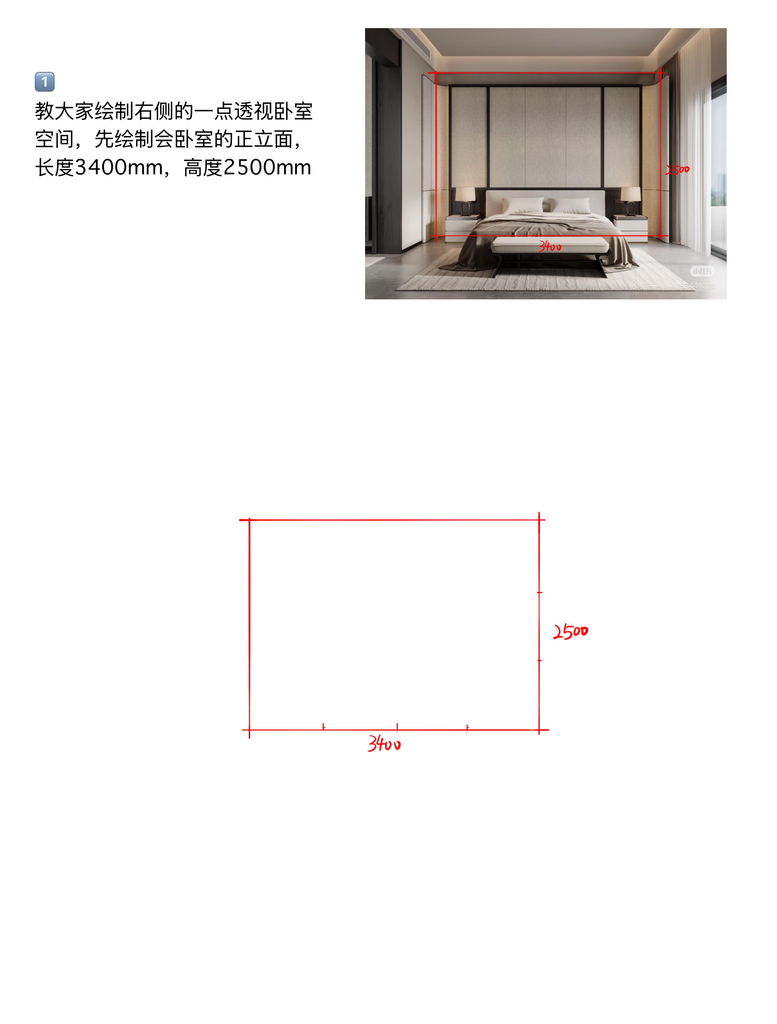
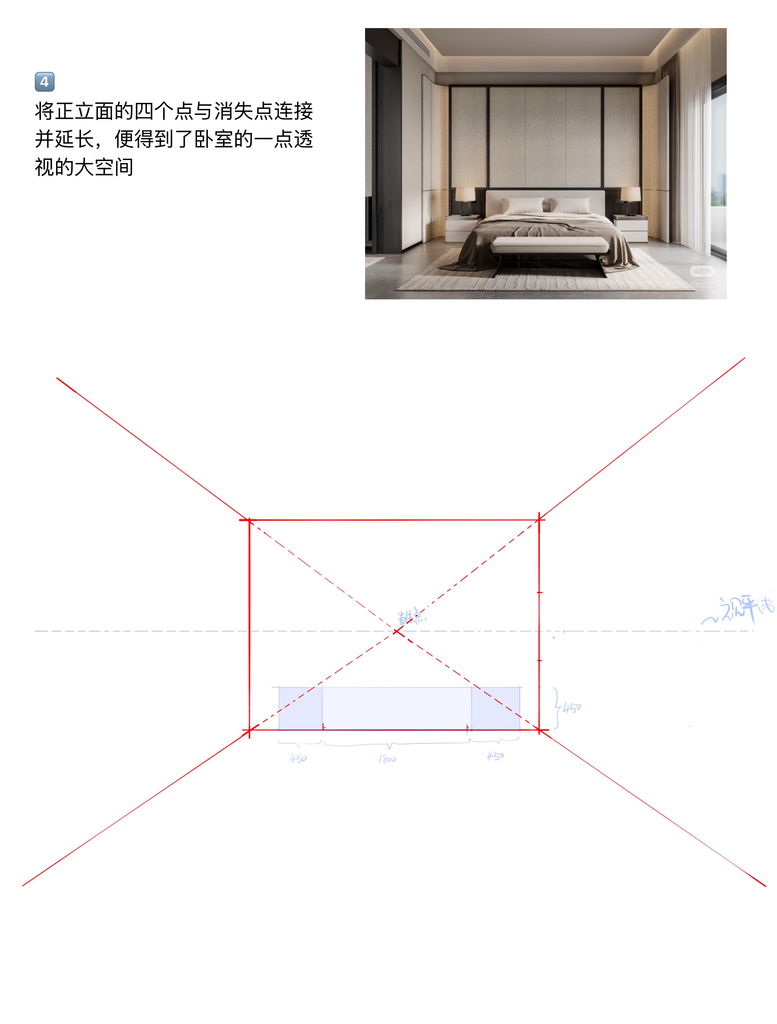
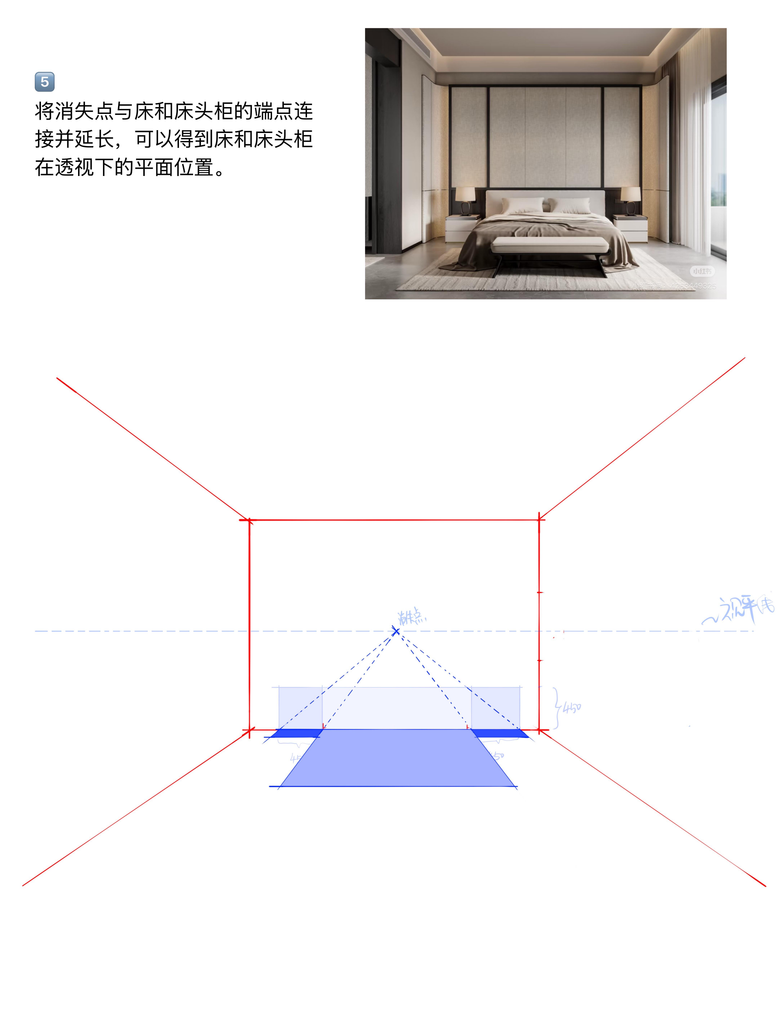
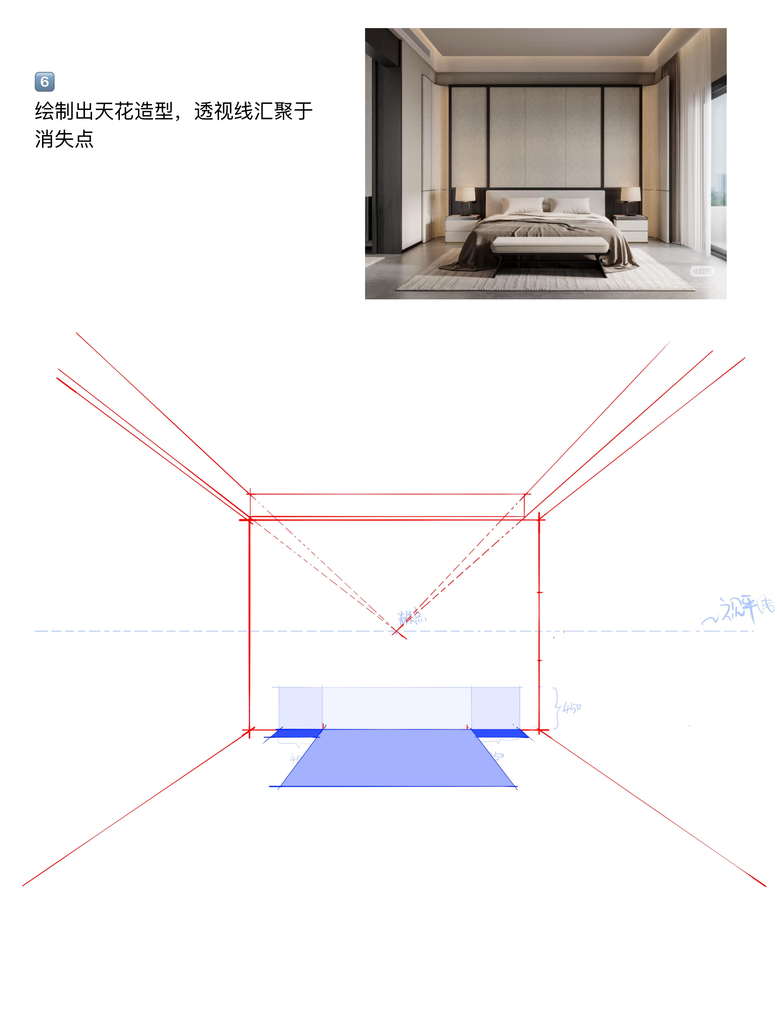
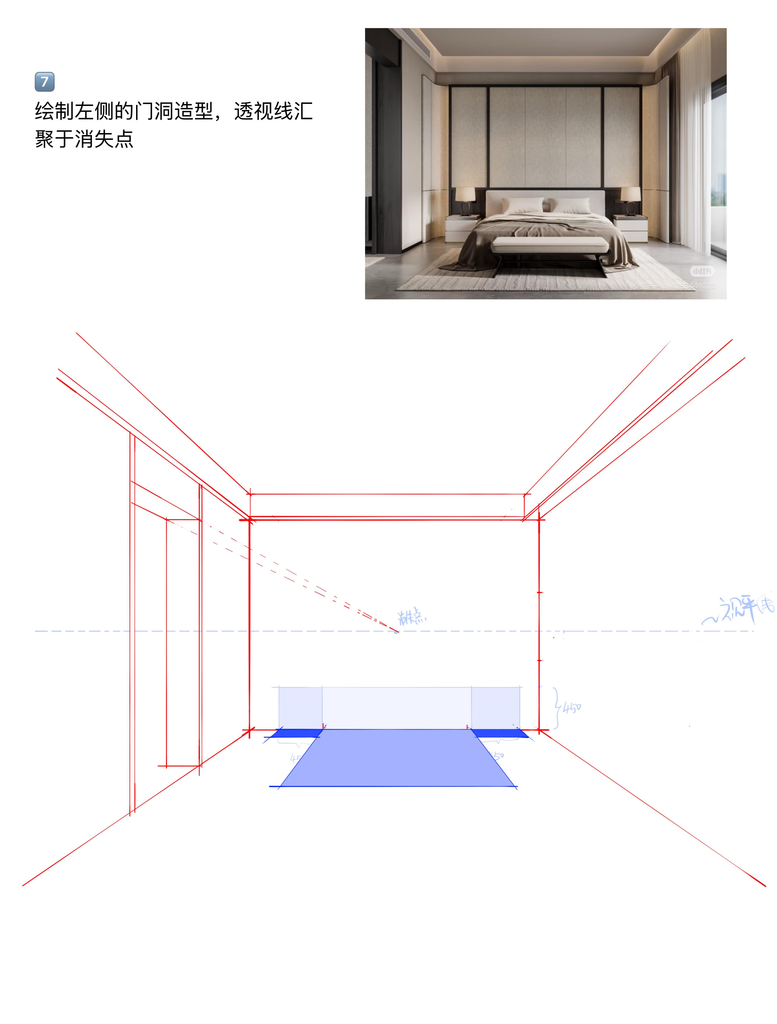
- Step 1: In this tutorial, we will learn how to draw a one-point perspective of a bedroom space from the right-hand view. First, draw the front elevation of the bedroom with a length of 3400mm and a height of 2500mm.
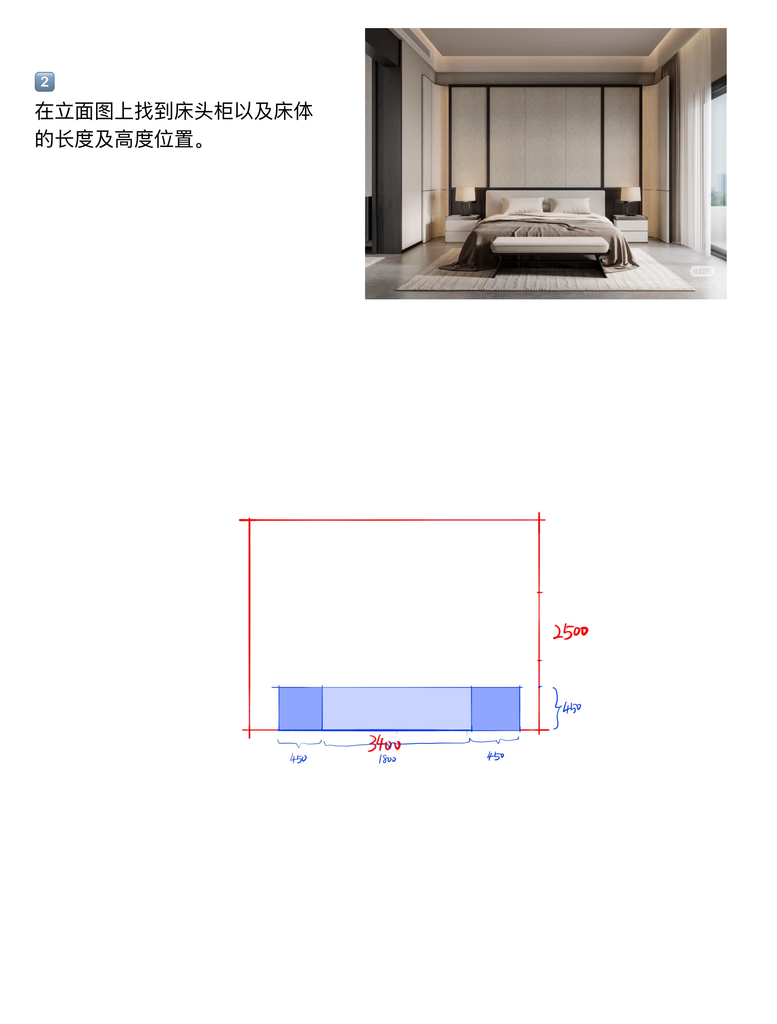
- Step 2: Locate the nightstands and the bed body on the elevation drawing, identifying their respective lengths and height positions.
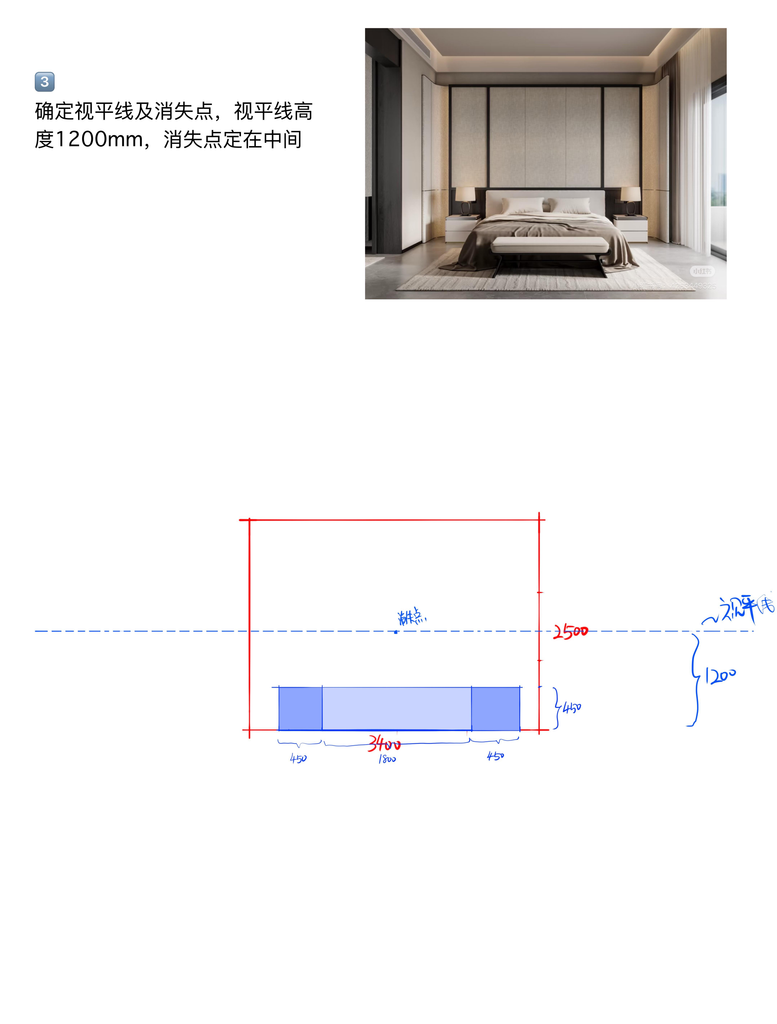
- Step 3: Establish the eye-level line and the vanishing point. Set the eye-level height to 1200mm, with the vanishing point positioned precisely in the center.
- Step 4: Connect the four corners of the front elevation to the vanishing point and extend the lines to form the large-scale spatial framework of the bedroom’s one-point perspective.
- Step 5: Connect the vanishing point to the endpoints of the bed and nightstands, then extend the lines to determine the plan positions of the bed and nightstands under perspective.
- Step 6: Render the ceiling architectural feature, ensuring all perspective construction lines converge at the vanishing point.
- Step 7: Draw the doorway profile on the left wall, with all perspective guidelines converging at the vanishing point.
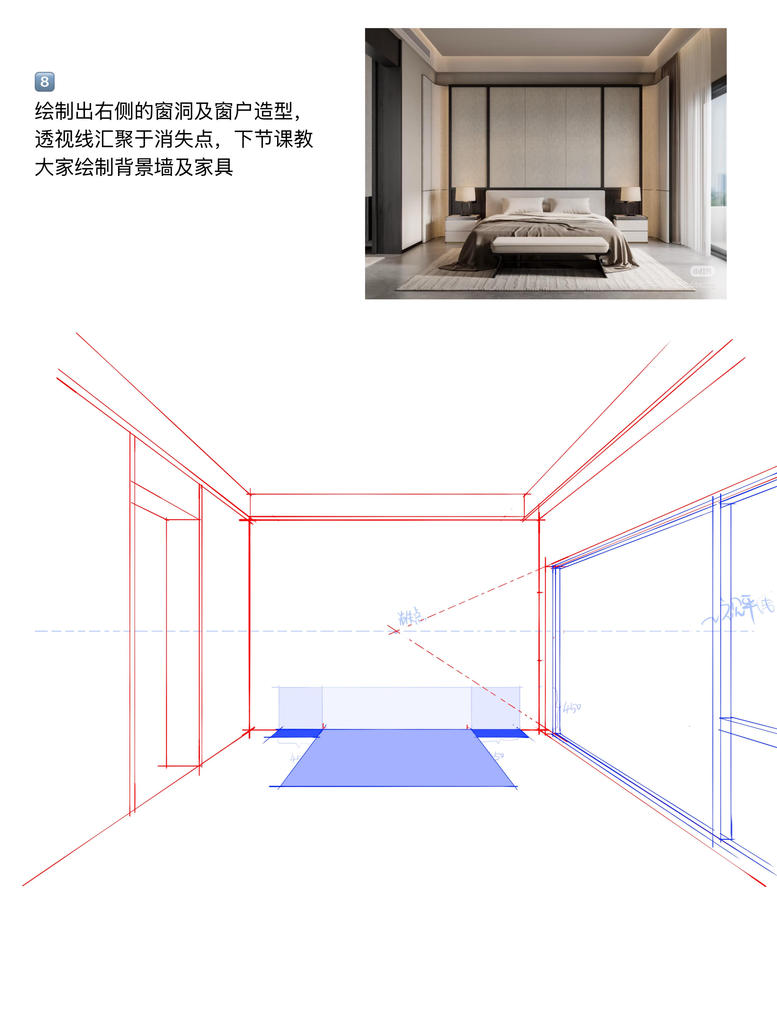
- Step 8: Sketch the window opening and window frame on the right side, keeping perspective lines converging at the vanishing point. In the next lesson, we will guide you through drawing the feature wall and furniture.